
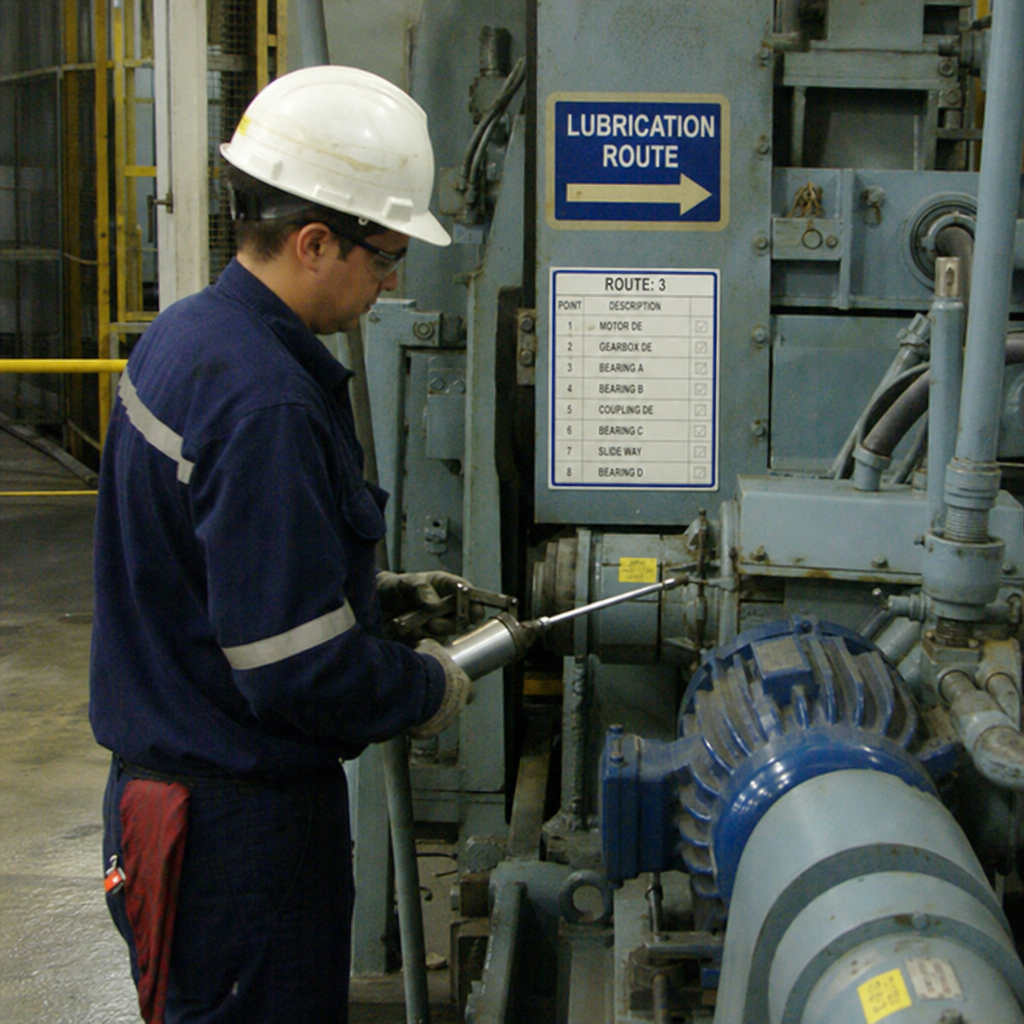
A well-built lubrication route turns equipment lubrication from a memory-based task into a repeatable maintenance process. It helps teams apply the right lubricant, in the right amount, at the right point, at the right interval while also creating a useful opportunity to inspect equipment condition. This lubrication guide explains how to create, refine, and manage routes that support reliability, accountability, and long-term lubrication excellence.
What makes a lubrication route effective?
An effective lubrication route is a planned sequence of lubrication and inspection tasks grouped by location, frequency, lubricant type, access requirements, and equipment criticality. It should be clear enough for a new technician to follow, structured enough for a supervisor to verify, and flexible enough to update when assets, conditions, or production schedules change.
The best routes are not simply lists of grease points. They connect the lubrication plan with real plant realities: walking distance, lockout requirements, machine availability, contamination control, storage practices, and the skill level of the person doing the work. When those details are missing, even a technically correct lubrication schedule can fail in execution.
A strong maintenance route also reduces variation. Instead of one technician greasing by habit and another relying on rough estimates, the route defines what must be done, how it should be done, and what should be recorded afterward.
Start with an asset walkdown
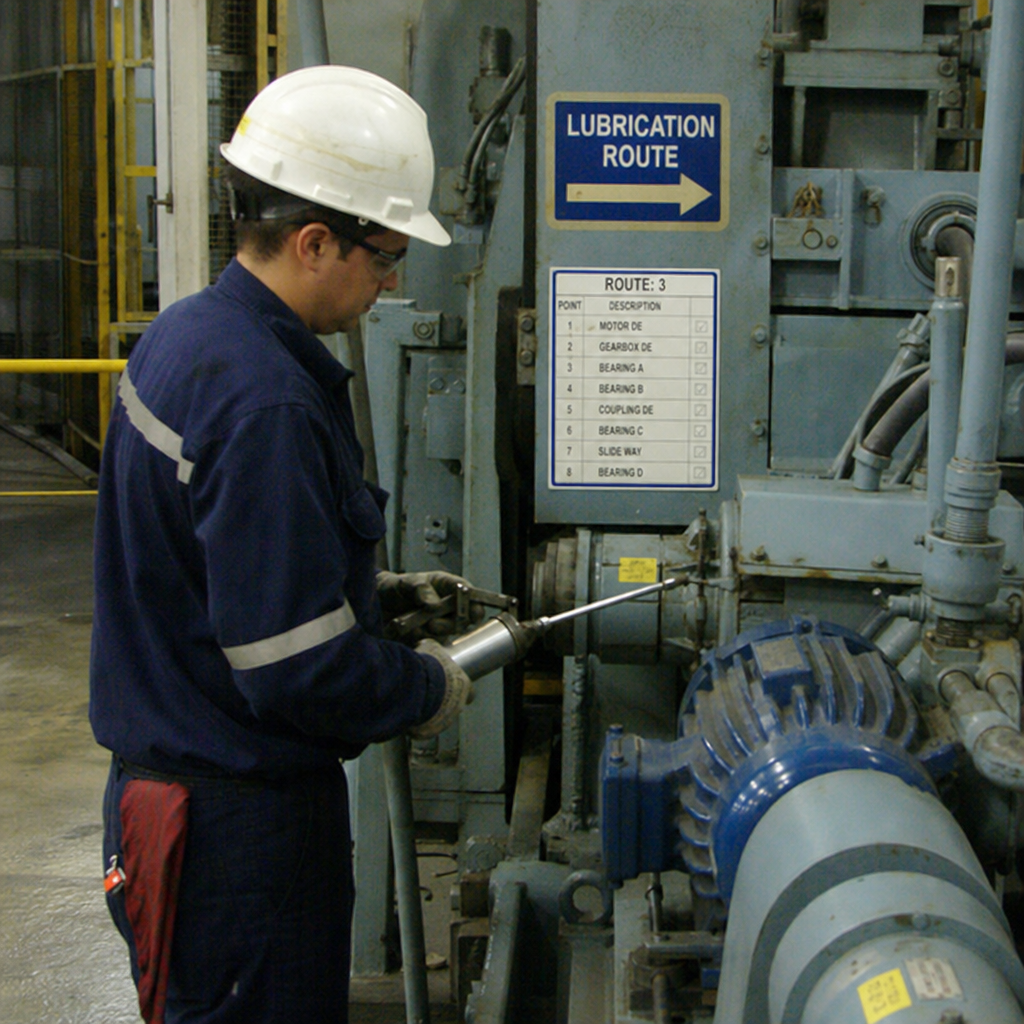
Before building the route on paper or in software, walk the facility. A plant walkdown gives you the context that asset lists, drawings, and maintenance history often miss. During the walkdown, identify every lubrication point, confirm equipment names, note access restrictions, and look for opportunities to group nearby tasks logically.
This is also the time to find hidden friction in the process. A lubrication point may look simple in a spreadsheet, but on the floor it may require a ladder, a machine shutdown, a special fitting, or cleaning before grease application. Capturing these realities early prevents routes that look efficient but are frustrating or unsafe to complete.
During the walkdown, record:
- Asset name, ID, and exact location
- Lubrication point type, such as bearing, gearbox, chain, coupling, or motor
- Lubricant required, including grade and compatibility considerations
- Application method, such as grease gun, oil top-up, oil change, mist system, or automatic lubricator
- Frequency, if already known or recommended
- Access needs, guards, permits, safety steps, and lockout requirements
- Condition observations, including leaks, overheating, abnormal noise, vibration, or contamination
- Photos or map references that help someone find the point quickly
The goal is not to create a perfect route in one pass. The goal is to build a dependable foundation so your maintenance checklist reflects the actual plant, not an idealised version of it.
Build the route around criticality and frequency
Once the lubrication points are identified, group them by how often they need attention and how important the equipment is to production, safety, quality, or cost. A small, non-critical conveyor bearing does not need to drive the same planning decisions as a production-critical gearbox. Critical assets deserve clearer instructions, tighter follow-up, and more careful review.
Frequency should be based on a combination of equipment requirements, lubricant type, environment, duty cycle, operating hours, and observed condition. Avoid copying intervals blindly from old checklists. If a machine has changed speed, load, temperature, washdown exposure, or operating schedule, the old lubrication schedule may no longer fit.
Common route frequency groups include:
- Daily or shift-based tasks for equipment exposed to heavy contamination, high duty cycles, or known reliability risks.
- Weekly tasks for routine grease application, oil level checks, and visual inspections.
- Monthly or quarterly tasks for lower-risk assets, oil sampling support, filter checks, and less frequent lubricant replenishment.
- Annual or shutdown-based tasks for oil changes, reservoir cleaning, or deeper inspections that require downtime.
Be careful with time-based routes. They are simple to manage, but they can encourage over-lubrication or under-lubrication if conditions vary widely. Over time, use inspection feedback, failure history, oil analysis, ultrasound, temperature readings, and other condition data to refine the lubrication plan.
Sequence tasks for flow, safety, and cleanliness
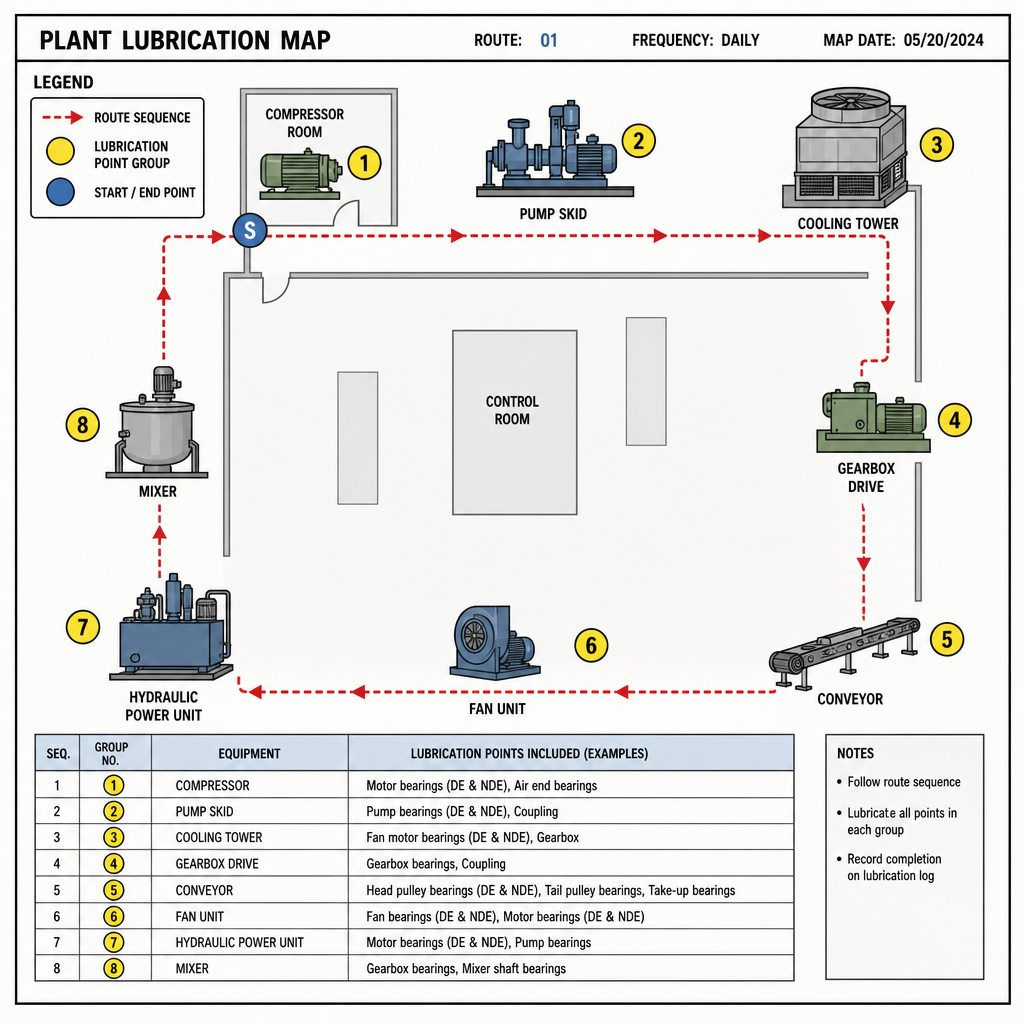
Route sequencing has a direct effect on labour time and quality. A route that sends a technician back and forth across the plant wastes time and increases the chance that steps will be skipped. A logical route follows the physical layout of the facility while respecting safety, production access, and contamination control.
Begin by mapping equipment locations. A simple 2D site map can make route planning much easier, especially in large plants or facilities with multiple floors, process areas, or production lines. Mark the lubrication points, then arrange them in a sequence that reduces walking distance and tool changes.
Good sequencing should consider:
- Location: Group nearby assets so the technician can move in a natural path.
- Lubricant type: Avoid unnecessary switching between oils, greases, and tools.
- Cleanliness: Handle cleaner or more sensitive lubrication points before dirty areas when practical.
- Safety: Place tasks requiring shutdowns, permits, or lockout together where possible.
- Production windows: Schedule equipment lubrication when machines are safely available.
- Inspection value: Allow enough time to observe leaks, noise, vibration, heat, and loose guards.
Do not make the route so tight that technicians feel pressured to rush. Lubrication is a precision maintenance activity, not a race. The route should make efficient work easier while still leaving room for careful application and observation.
Create a practical maintenance checklist
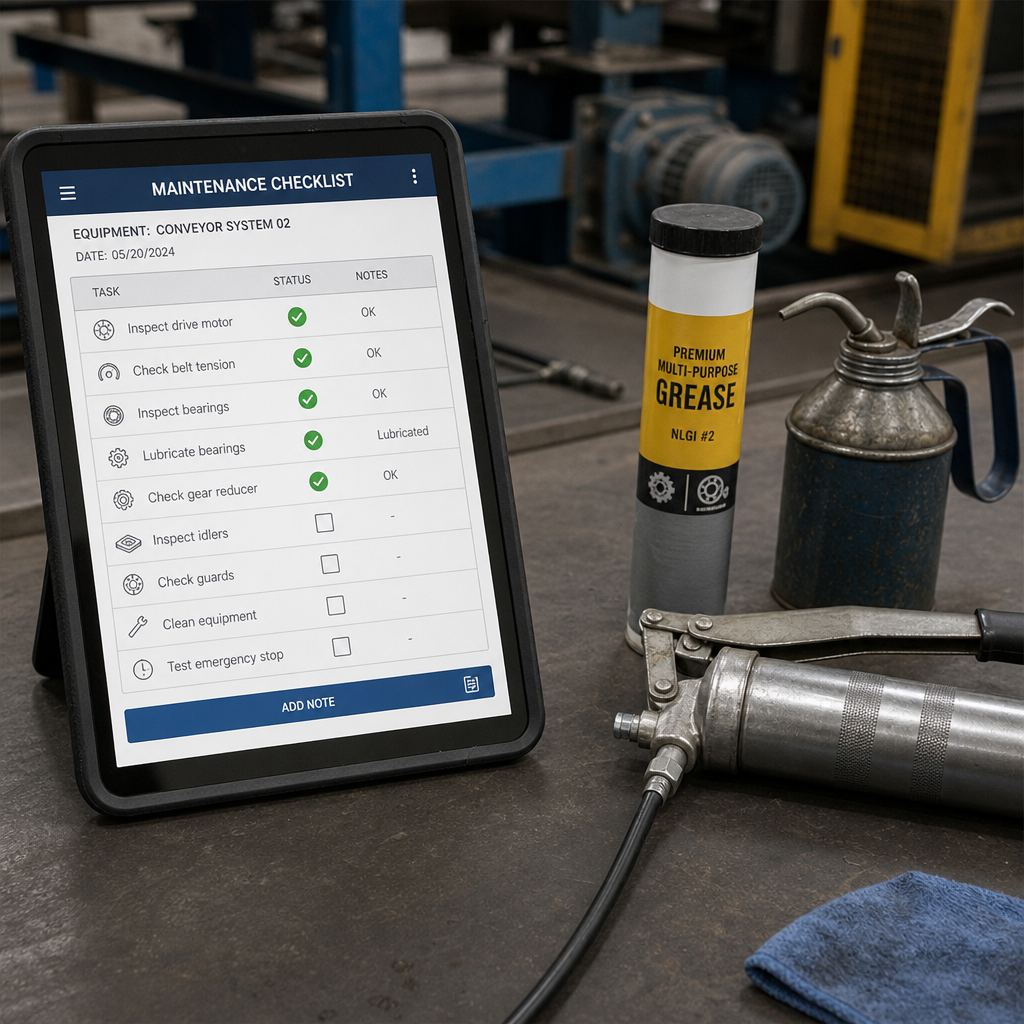
A maintenance checklist should do more than tell someone to “lubricate motor” or “grease bearing.” It should remove ambiguity. If the task requires a specific grease, a fixed number of shots, a purge observation, or cleaning around the fitting before application, the checklist should say so.
For each task, include the information a technician needs at the point of work:
- Asset ID and plain-language equipment name
- Exact lubrication point location
- Required lubricant and application method
- Quantity or instruction for controlled grease application
- Frequency and estimated task duration
- Safety precautions and access notes
- Tools, fittings, adapters, or sampling equipment needed
- Acceptance criteria, such as correct level, no leakage, normal sound, or clean breather condition
- Space to record completion, findings, exceptions, and follow-up work
A clear checklist supports consistency, but it also protects knowledge. If your facility depends on a few experienced people remembering where everything is and how every asset should be lubricated, the process is vulnerable. Documentation gives newer technicians a safer starting point and helps experienced technicians spend less time explaining the basics.
Should you use paper, spreadsheets, or digital tools?
Use the simplest system that can reliably control the work, but move beyond paper or spreadsheets when updates, missed tasks, accountability, or route complexity become difficult to manage. Paper can work for small facilities with stable equipment, while digital systems are better suited to changing routes, larger teams, and programs that need stronger visibility.
Paper checklists are easy to start and inexpensive to maintain, but they can be lost, copied incorrectly, or filed without review. Spreadsheets improve structure and filtering, yet they often become static documents that do not reflect what happened on the floor. Digital lubrication management tools can assign routes, track completion, capture findings, and make updates easier across the team.
When choosing a route management method, consider:
- How many lubrication points must be managed
- How often assets, frequencies, or lubricant details change
- Whether supervisors need real-time visibility into completed and missed tasks
- How easily technicians can access instructions at the machine
- Whether photos, maps, barcodes, or mobile devices would reduce errors
- How route data connects with your CMMS or work order process
- Whether exceptions automatically create follow-up actions
A digital tool does not fix a weak lubrication plan by itself. The underlying route still needs correct asset data, realistic frequencies, trained technicians, and review discipline. Software becomes valuable when it makes good practices easier to repeat and poor follow-up harder to hide.
Train technicians on the “why,” not just the route
Even the best route will fail if technicians treat lubrication as a low-skill task. Training should explain why lubricant selection, cleanliness, quantity, and application technique matter. Too much grease can cause heat, seal damage, and energy loss. Too little can leave surfaces unprotected. Dirty fittings can introduce contamination directly into the component.
Technicians should understand how to prepare the point before lubrication, how to identify abnormal purge, how to avoid mixing incompatible lubricants, and when to stop and report a problem instead of forcing the task complete. They should also know what observations matter. A routine lubrication route may reveal early warning signs such as leaks, unusual sound, excess heat, damaged breathers, loose guards, or visible vibration.
Useful training topics include:
- Lubricant storage and handling basics
- Grease gun calibration and controlled application
- Cleaning fittings before use
- Reading sight glasses and level indicators correctly
- Recognising signs of contamination, leakage, or over-lubrication
- Recording meaningful observations instead of vague notes
- Escalating defects found during the route
This is where lubrication excellence becomes a practical behaviour rather than a slogan. The route gives structure, but technician judgement gives it value.
Add condition-based feedback over time
A traditional lubrication schedule is usually time-based: daily, weekly, monthly, quarterly. That is a useful starting point, especially when equipment history is limited. However, machines do not all need lubrication at the same rate. Load, speed, temperature, contamination, run hours, and operating environment can change the need significantly.
Condition-based lubrication uses inspection data and monitoring tools to adjust the work. This might include ultrasound for bearing lubrication, oil analysis for gearboxes and reservoirs, temperature trending, vibration monitoring, or sensors that indicate operating condition. Instead of lubricating only because the calendar says so, the team can make better decisions based on what the asset is actually doing.
You do not need to convert every asset at once. Start with high-value or high-failure assets where poor lubrication has a clear operational impact. Use condition data to confirm whether current intervals are too short, too long, or appropriate. Then adjust the lubrication plan in controlled steps, documenting the reason for each change.
Review and optimise the route regularly
A lubrication route should not be a set-and-forget document. Equipment is moved, lubricants change, production patterns shift, and technicians discover better ways to perform the work. Build a review cycle so route improvements become normal rather than occasional clean-up projects.
Review route performance by looking at missed tasks, repeated defects, excessive task times, lubricant consumption, technician feedback, and equipment failure history. If a route is constantly missed, the problem may be unrealistic timing, poor access, unclear ownership, or conflict with production. If lubricant use is unexpectedly high, check for over-application, leaks, wrong quantities, or unclear instructions.
A practical optimisation checklist includes:
- Remove retired or duplicate assets from the route
- Confirm every lubrication point is still accessible and correctly labelled
- Update lubricant names, quantities, and application methods
- Rebalance routes that take too long or contain too many critical tasks
- Add photos or map references where technicians lose time searching
- Review missed tasks and assign follow-up responsibility
- Compare inspection findings with completed lubrication records
- Adjust frequencies based on condition evidence and failure history
Route optimisation is not only about speed. The real aim is dependable execution, fewer avoidable failures, and clearer control of maintenance work.
A better route creates better reliability habits
Building and optimising a lubrication route is one of the most practical ways to improve asset care. Start with a detailed walkdown, organise tasks by frequency and criticality, sequence the route around real plant movement, and support the work with a clear maintenance checklist. Then keep improving through technician feedback, condition data, and disciplined updates.
The result is more than a cleaner lubrication schedule. It is a maintenance route that helps teams reduce guesswork, protect equipment, and spot problems earlier. When equipment lubrication is planned, documented, executed, and reviewed well, lubrication becomes a reliability process rather than a recurring chore.